
Installing OpenClaw on Your VPS — Complete Guide
OpenClaw is an open-source AI assistant that runs on your own server. You maintain full control over your data and privacy. This guide walks you through the complete installation process.
What is OpenClaw?
OpenClaw is a self-hosted AI assistant that you can connect to popular messaging platforms like Telegram, WhatsApp, Discord, and Slack. It offers:
- AI conversations with GPT-4, Claude, or local models
- Web browsing — the assistant can visit websites and retrieve information
- File management — read, write, and analyze documents
- Command execution — controlled shell access on your server
- Skills system — modular capabilities you can enable/disable
- Privacy-first — all data stays on your server
System Requirements
| Component | Minimum | Recommended |
|---|---|---|
| RAM | 2 GB | 4 GB (for web browsing) |
| CPU | 1 vCPU | 2 vCPU |
| Storage | 25 GB NVMe | 50 GB NVMe |
| OS | Ubuntu 24.04 LTS | Ubuntu 24.04 LTS |
Tip: Choose at least the Browser Automation package (4 GB RAM) if you want to use the web browsing feature. Headless Chrome requires additional memory.
Step 1: Order Your VPS
- Go to maenda.media/configurator/vps
- Choose a VPS package that meets the system requirements
- Select "OpenClaw" as the Template
- Complete your order
After payment, your VPS is automatically created and configured. This takes approximately 3-5 minutes.
Step 2: What Gets Automatically Installed?
When choosing the OpenClaw template, the following is automatically installed and configured:
| Component | Version | Description |
|---|---|---|
| Ubuntu | 24.04 LTS | Operating system |
| Node.js | 22 LTS | Runtime for OpenClaw |
| Go | 1.23 | Compiler for native modules |
| UFW | Latest | Firewall (only port 22 open) |
| fail2ban | Latest | Brute-force protection |
| OpenClaw | Latest | The AI assistant itself |
| logrotate | System | Automatic log rotation |
Security Configuration
The following security measures are automatically applied:
✅ UFW Firewall — Only SSH (port 22) allowed
✅ fail2ban — Blocks IPs after 5 failed login attempts
✅ Automatic updates — Security updates installed automatically
✅ SSH hardening — Root login disabled, key-based auth only
✅ Logrotate — Prevents logs from filling the disk
Step 3: Connect via SSH
After installation, you'll receive an email with your SSH credentials.
ssh user@your-server-ip
Note: On the first connection, you'll be asked to accept the server fingerprint. Type
yesto continue.
Step 4: Initial Configuration (Onboarding)
Upon first SSH login, the OpenClaw onboarding wizard starts automatically:
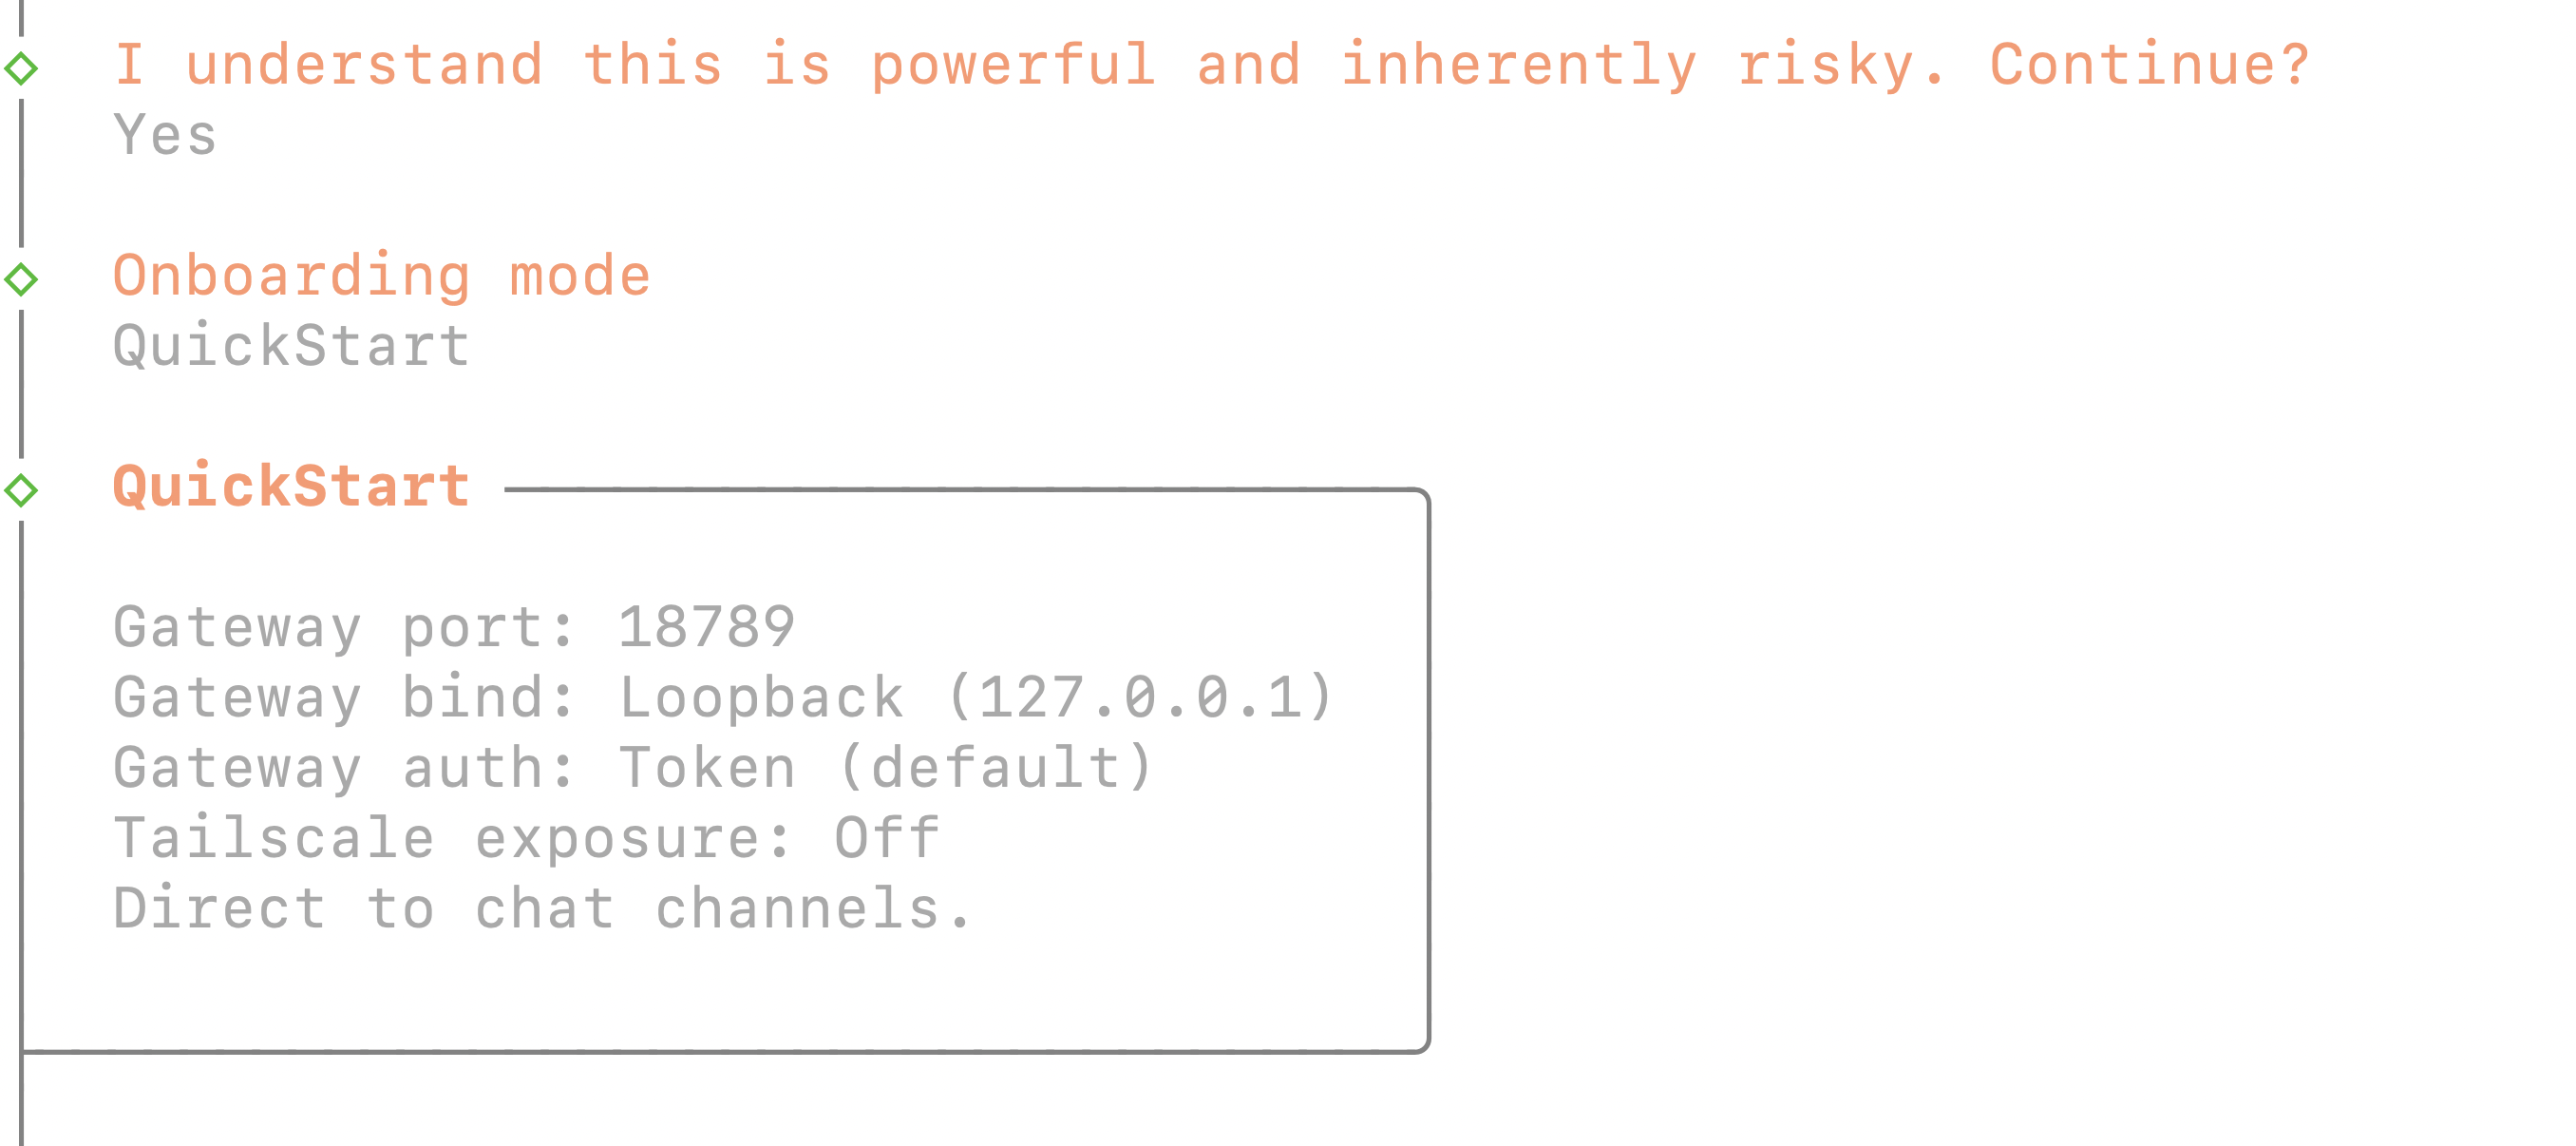 OpenClaw onboarding wizard — step-by-step configuration
The wizard guides you through:
4.1 Setting Up AI Provider
Choose your AI provider and enter your API key:
| Provider | Models | API Key |
|---|---|---|
| OpenAI | GPT-4, GPT-4o, GPT-3.5 | platform.openai.com/api-keys |
| Anthropic | Claude 4.5 Sonnet, Claude 3.5 Haiku | console.anthropic.com |
| Local | Ollama, LM Studio | No API key needed |
4.2 Connecting a Messaging Platform
Connect at least one messaging platform:
Telegram (recommended for beginners):
- Open Telegram and search for @BotFather
- Send
/newbotand follow the instructions - Copy the bot token
- Paste the token in the wizard
4.3 Configuring Skills
Choose which capabilities your assistant has:
- Web Browsing — Visit websites and retrieve information
- File Management — Read and write files
- Command Execution — Execute shell commands (with restrictions)
- Image Generation — Generate images with DALL-E
- Code Execution — Run Python/JavaScript code in sandbox
Step 5: The Terminal UI (TUI)
OpenClaw has a built-in terminal interface for direct interaction:
 OpenClaw Terminal UI — interactive console interface
Starting the TUI
openclaw tui
TUI Commands
| Command | Description |
|---|---|
/help | Show all available commands |
/status | View status of all services |
/config | Open configuration editor |
/logs | View recent logs |
/restart | Restart the OpenClaw service |
/skills | Manage capabilities |
/quit | Exit the TUI |
Step 6: Connecting a Domain (Optional)
To access OpenClaw via a web browser (for the Control UI), connect a domain:
DNS Configuration
Type: A
Name: openclaw (or @ for main domain)
Value: your-server-ip
TTL: 3600
Caddy Reverse Proxy
sudo nano /etc/caddy/Caddyfile
openclaw.yourdomain.com {
    reverse_proxy localhost:3000
}
sudo systemctl restart caddy
Caddy automatically handles SSL certificates via Let's Encrypt.
Updates & Maintenance
Updating OpenClaw
openclaw update
Viewing Logs
journalctl -u openclaw -f
Backup
tar -czf openclaw-backup-$(date +%Y%m%d).tar.gz /opt/openclaw/data
Directory Structure
/opt/openclaw/
├── data/               # Conversation history, files
│   ├── conversations/  # Saved conversations
│   ├── files/          # Uploaded/generated files
│   └── db/             # SQLite database
├── config/             # Configuration files
│   ├── config.yml      # Main configuration
│   ├── skills.yml      # Skills configuration
│   └── platforms.yml   # Messaging platform configuration
├── skills/             # Installed capabilities
├── logs/               # Log files
└── node_modules/       # Node.js dependencies
FAQ
Which messaging platforms are supported?
OpenClaw supports: Telegram, WhatsApp, Discord, Slack, Signal, and Matrix. You can connect multiple platforms simultaneously.
Is my data safe?
Yes. All data is stored locally on your server. No data is sent to external servers (except to the AI provider for generating responses). You can also use a local AI model (via Ollama) for complete privacy.
How much memory do I need?
- 2 GB RAM — Basic: text conversations and simple tasks
- 4 GB RAM — Recommended: web browsing and file management
- 8 GB RAM — Full: all features including local AI models
More Information
- OpenClaw Documentation: open-claw.org/docs
- GitHub Repository: github.com/openclaw/openclaw
- Community Discord: discord.gg/openclaw
Ready to get started? Order your OpenClaw VPS →